That Java Thing, Part 6: Creating the Feature and Update Site
Sun Nov 08 10:45:08 EST 2015
- Nov 02 2015 - That Java Thing, Part 1: The Java Problem in the Community
- Nov 03 2015 - That Java Thing, Part 2: Intro to OSGi
- Nov 04 2015 - That Java Thing, Part 3: Eclipse Prep
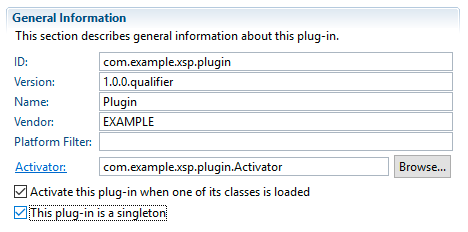
- Nov 05 2015 - That Java Thing, Part 4: Creating the Plugin
- Nov 06 2015 - That Java Thing, Part 5: Expanding the Plugin
- Nov 08 2015 - That Java Thing, Part 6: Creating the Feature and Update Site
- Nov 09 2015 - That Java Thing, Part 7: Adding a Managed Bean to the Plugin
- Nov 10 2015 - That Java Thing, Part 8: Source Bundles
- Nov 11 2015 - That Java Thing, Part 9: Expanding the Plugin - Jars
- Nov 12 2015 - That Java Thing, Part 10: Expanding the Plugin - Serving Resources
- Nov 16 2015 - That Java Thing, Interlude: Effective Java
- Dec 01 2015 - That Java Thing, Part 11: Diagnostics
- Dec 03 2015 - That Java Thing, Part 12: Expanding the Plugin - JAX-RS
- Feb 19 2016 - That Java Thing, Part 13: Introduction to Maven
- Feb 21 2016 - That Java Thing, Part 14: Maven Environment Setup
- Feb 22 2016 - That Java Thing, Part 15: Converting the Projects
- Feb 23 2016 - That Java Thing, Part 16: Maven Fallout
- Feb 26 2017 - That Java Thing, Part 17: My Current XPages Plug-in Dev Environment
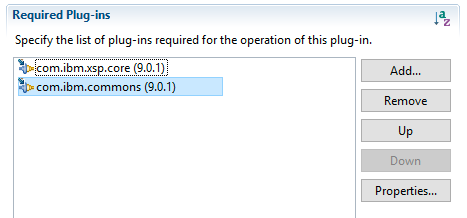
The last post covered turning our nascent plugin into a proper XPages library, so now it's time to fill in the remaining pieces to get it installed.
To do that, we'll need a feature and an update site. The feature will point to our plugin - in a more-complicated setup, this could point to several related plugins, but we'll just need the one. The update site will do similarly, referencing the feature in a way that Eclipse-type platforms know about.
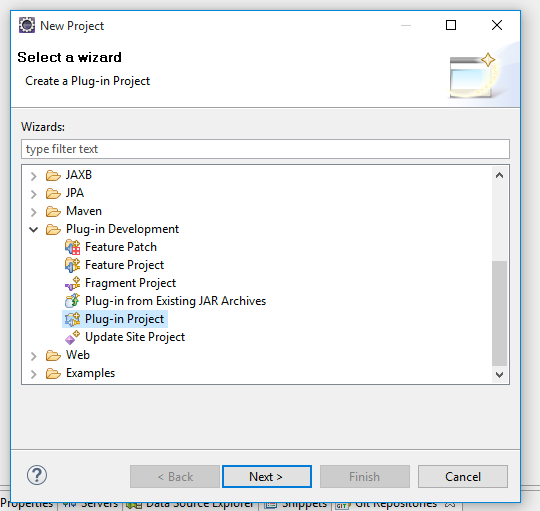
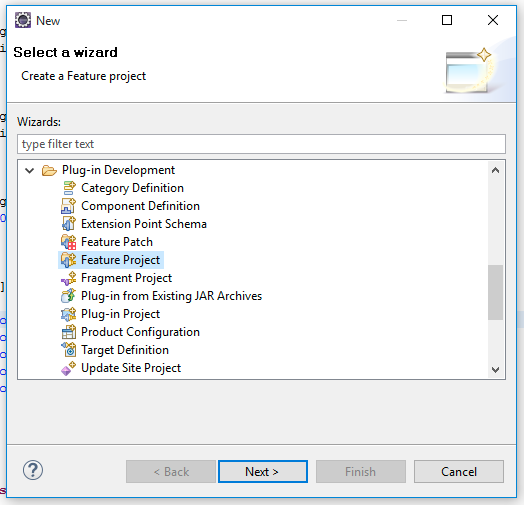
Go to File → New and choose "Feature Project" within "Plug-in Development":
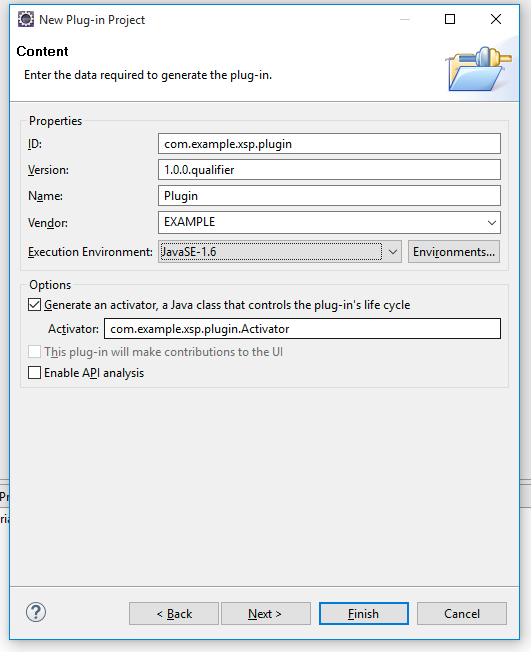
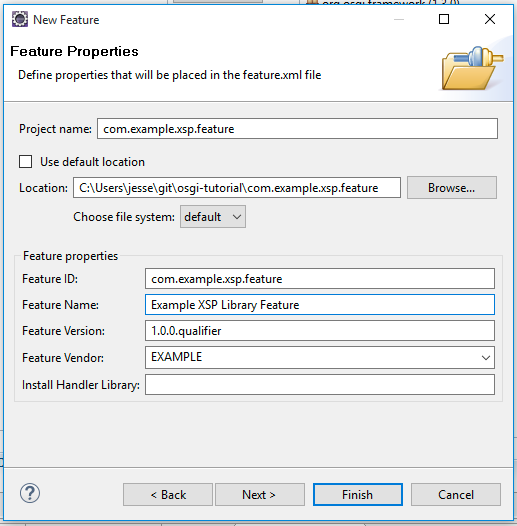
Hit "Next" and fill out the feature details:
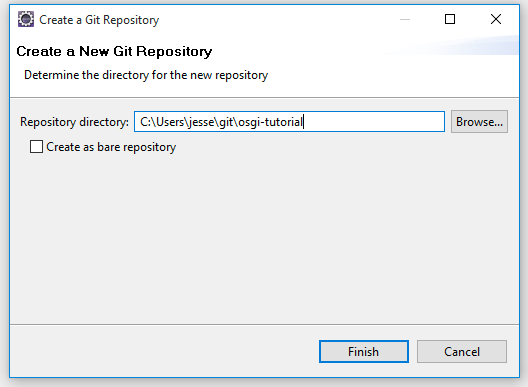
- Set the project name to "com.example.xsp.feature"
- Override the location with a folder inside the Git repository (remembering to include the feature name in the path, to avoid placing it in the top-level folder)
- Pick a feature name, such as "Example XSP Library Feature"
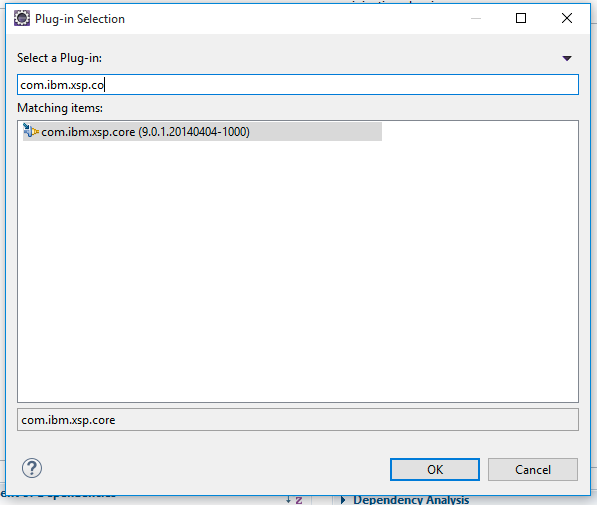
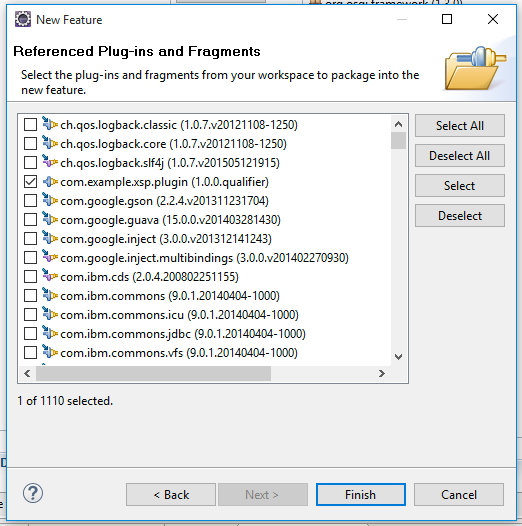
Click "Next", find and check "com.example.xsp.plugin" in the list of plugins to include in the feature, and click "Finish":
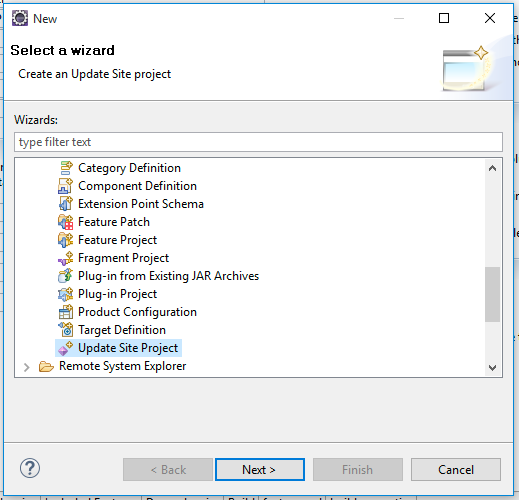
That's about it for the feature. Next up: the update site. As before, go to File → New and choose "Update Site Project" within "Plug-in Development":
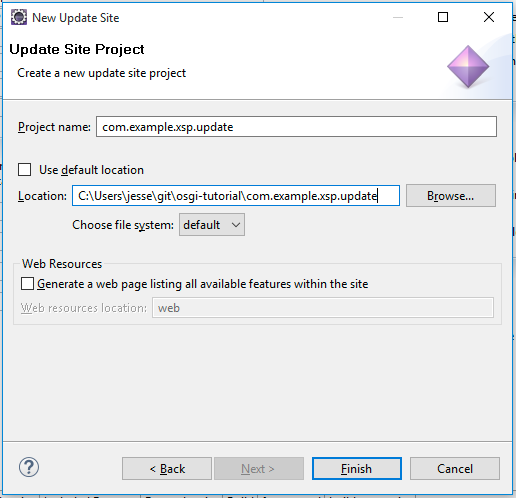
There's not much configuration to do for this one: just name it "com.example.xsp.update" and override its location to be within your Git repository:
Once the update site is created, click "Add Feature.." in the site.xml editor and add the new "com.example.xsp.feature" project:
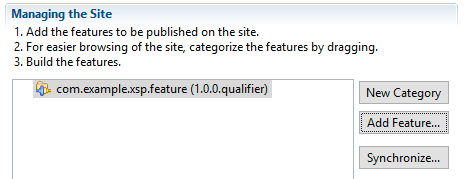
One last optional step is to set up a category in the update site, which will help organization on the server. To do that, click "New Category" and give it a name and ID. Then, drag the feature in the list onto the category to add it to the group:
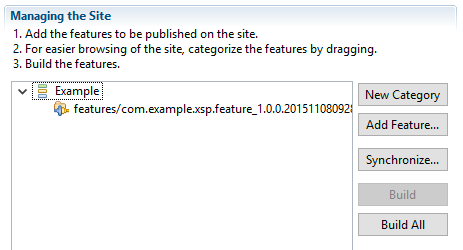
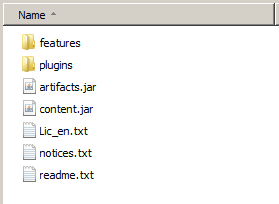
Now the update site definition is set up, and the next step is to click "Build All" to have Eclipse package your plugin inside the update site. That will create a number of files within your update site project, which are the actual artifacts we need:
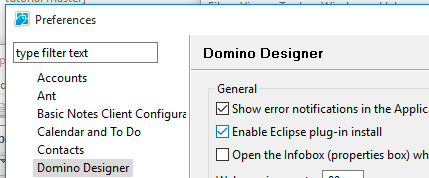
Next is to install the library into Designer. Launch Notes, then Designer (the sequence is important to avoid a bug with NSF update sites, so I stick to this habit), and open Preferences. In there, go to the "Domino Designer" section and check "Enable Eclipse plug-in install":
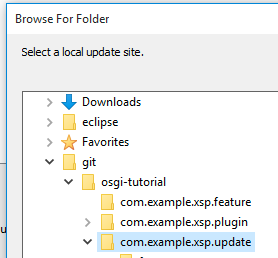
Hit "OK" to close the preferences and then go to File → Application → Install. In the dialog that pops up (sometimes there's a lengthy delay before it does for some reason), select "Search for new features to install" and click "Next". On the next pane, choose "Add Folder Location..." and browse to the update site project:
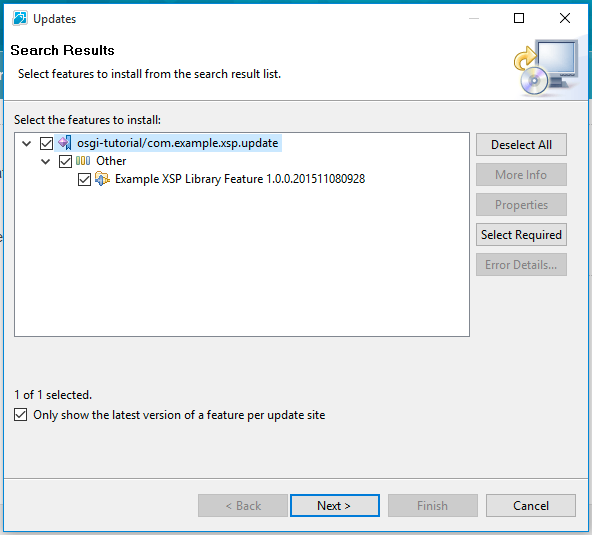
The next dialog will prompt for a name, and for now the default will do. Click "OK" in this dialog and "Finish" in the main one. If all goes well, that should bring up another dialog after a couple of seconds, which will allow you to select the feature:
Click "Next" and then "Finish". As it installs, you'll get a prompt to install the unsigned plugin, so select "Install this plug-in" and click "OK". Designer will do its thing and then display a small toast window in the bottom right asking if you want to restart now. It at least used to be the case that clicking this didn't do a proper restart (presumably due to the Notes stuff), so I still avoid clicking it. Instead, close Notes and Designer, and then relaunch them (Notes first again).
Now, to see that everything is working, open an existing application in Designer (or make a new one), go to Application Configuration → Xsp Properties → Page Generation tab, and look for "com.example.xsp.library" in the "XPage Libraries" section:
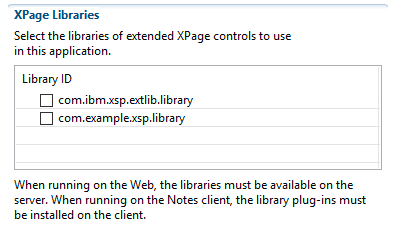
If it's not there, something went wrong. Unfortunately, debugging this sort of thing can get hairy, so it'd probably be best to ask me or someone else knowledgable about plugins for assistance for now.
Assuming it did work, though: great! Next up is the installation on the server. This is a whole tutorial on its own, and fortunately IBM has done the job for me. The upshot of those instructions is:
- Create a database on the server using the "Eclipse Update Site" template (updatesite.ntf) and clean up the ACL to something appropriate. To see the template, make sure to click "Show advanced templates".
- Import
com.example.xsp.updateby using the "Import Local Update Site" option and pointing to its site.xml file - Set the notes.ini property "OSGI_HTTP_DYNAMIC_BUNDLES" on the server to point to the file name of that update site
- Restart HTTP or the entire server
Once HTTP or the server is restarted, you can test to see if it's working by creating an application on the server that has the library checked in the Xsp Properties page as above, and then visiting an XPage in it with a browser. If it's working, it will load normally; otherwise, it will complain about the application relying on a missing library.
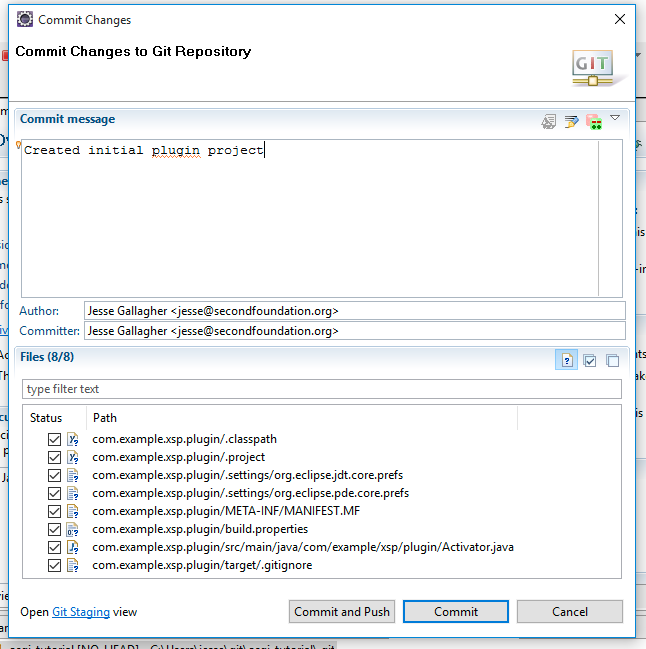
So that covers the build and installation cycle! There's one last change to make in the projects before we commit them to Git. The update site project produces tons of Jar files - two for every "Build All" click - and there's no need to check them into the repository. This is a job for a .gitignore file, which we'll put in the update site project because we don't want to ignore intentional Jars later - .gitignore files cascade hierarchically. Right-click on the update site project in Eclipse and choose New → File:

Name the file ".gitignore" (with the starting dot) and click "Finish". The file contents should be a single line:
*.jar
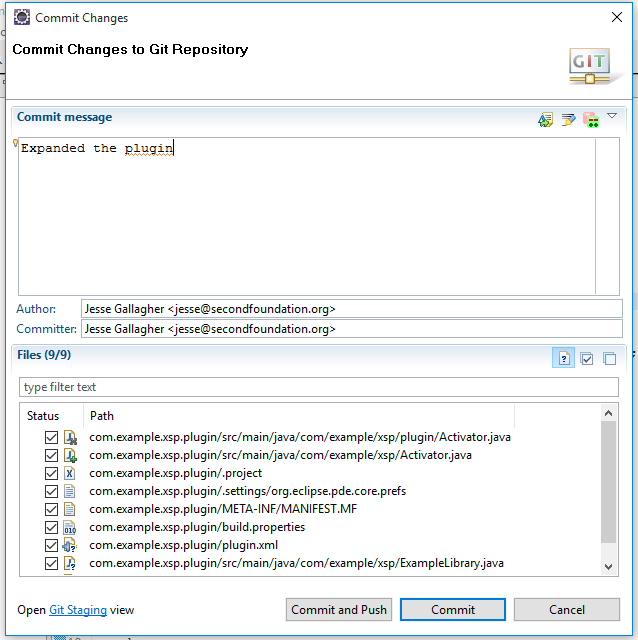
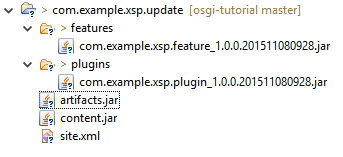
Now, go to commit the changes to the repository, and you should be able to see the projects and Git ignore file we created, but not the Jars:

Now that we have the library built and deployed to the server, the next step will be to actually make it useful, by adding some Java code and accessing it from the XPages application.